Using Python with Arduino: A Comprehensive Guide
Using Python with Arduino: A Comprehensive Guide
Introduction
Python and Arduino are two powerful tools that can work
together to build new projects and automation solutions. While Arduino is
well-known for its ability to communicate with physical components, Python is a
powerful and easy-to-use programming language. Combining these two technologies
opens up a whole new universe of possibilities, ranging from robots and IoT
devices to home automation systems. In this tutorial, we'll go over the
foundations of utilizing Python with Arduino and walk you through the process
step by step.
Table of Contents:
0. What is a
Microcontroller?
1. What is Arduino?
2. Introduction to Python
3. Why Combine Python and Arduino?
4. Setting Up Arduino and Python
4.1 Installing the
Arduino IDE
4.2 Installing
Python and Required Libraries
5. Establishing Communication
5.1 Serial
Communication
5.2 PySerial
Library
6.
Advanced Python-Arduino Integration
6.1 Using Libraries like PyFirmata
6.2 Processing Sensor Data in Python
7.
Conclusion
Section 0: What is a
Microcontroller?
Wikipedia1
says:
A
microcontroller is a small computer on a single integrated circuit containing a
processor core, memory, and programmable input/output peripherals.
The
important part for us is that a micro-controller contains the processor (which
all
computers have) and memory, and some input/output pins that you can.
control.
(Often called GPIO - General Purpose Input Output Pins)
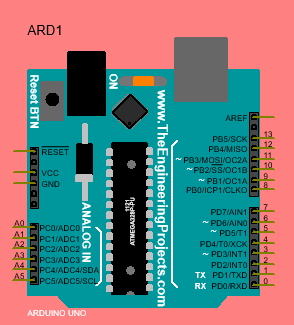
Section 1: What is Arduino?
Arduino is an open-source electronics platform that consists
of hardware boards and a development environment. It allows users to create
interactive projects by controlling various electronic components such as
sensors, motors, and LEDs.
We will be using
proteus /tinker cad to simulate this .

Section 2: Introduction to Python
Python is a high-level, interpreted programming language
known for its simplicity and readability. It offers a wide range of libraries
and frameworks that make it ideal for rapid prototyping and development.
Section 3: Why Combine Python and Arduino?
Combining Python and Arduino offers several advantages,
including the simplicity and flexibility of Python for programming complex logic
and algorithms, while Arduino handles the low-level interfacing with hardware
components.
Section 4: Setting Up Arduino and Python
This section guides you through the installation process of
the Arduino IDE and the necessary Python libraries for communication between
Python and Arduino.
Section 4.1: installing Arduino.
If you have access to the internet,
there are step-by-step directions and the software available at:
http://arduino.cc/en/Main/Software
Otherwise, the USB stick in your kit2 has the software under
the Software
Directory. There are two directories under that. One is
“Windows” and the
other is “Mac OS X”. If you are installing onto Linux, you
will need to follow
the directions at: http://arduino.cc/en/Main/Software
Section
4.2: installing python.
Download and
install Python on your computer from the official website. Make sure to add
Python to your system’s PATH during the installation process.
type add environment variables to path on your search windows.
add the path to the python file with edit
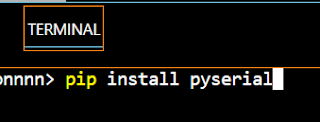
Install PySerial
by opening a command prompt or terminal and running the command pip install
pyserial.
Section 5: Establishing Communication
Learn how to establish serial communication between Arduino
and Python using the PySerial library. This section covers the basics of serial
communication and demonstrates how to send and receive data.
Install PySerial:
Make sure you have PySerial installed in your Python environment. You
can install it using pip by running the following command:
```
pip install pyserial
```
Set up the Arduino Simulator:
Choose an Arduino simulator such as Arduino Simulator or Tinkercad.
These simulators provide a virtual Arduino environment where you can write and
run code. Create a new project and open the Arduino simulator's code editor.
Arduino Code:
In the Arduino simulator's code editor, write the Arduino code that sets
up the serial communication and defines the data you want to send or receive.
The code should be similar to the code you would use on a physical Arduino. For
example:
```cpp
void setup() {
Serial.begin(9600); // Set the baud rate to match Python
}
void loop() {
// Send data to Python
Serial.println("Hello from
Arduino!");
// Receive data from Python
if (Serial.available()) {
String data =
Serial.readStringUntil('\n');
Serial.print("Received data:
");
Serial.println(data);
}
delay(1000); // Delay between data transmissions
}
```
Python Code:
Open your Python script or create a new one to establish serial
communication with the Arduino simulator. The process is similar to
establishing communication with a physical Arduino. Here's an example:
```python
import serial
# Create a serial object
arduino = serial.Serial('COM3', 9600)
# Replace 'COM3' with the appropriate port
# Send data to Arduino
arduino.write(b"Hello from Python!\n")
# Receive data from Arduino
data = arduino.readline()
print("Received data:", data.decode().strip())
# Close the serial connection
arduino.close()
```
Run the Simulation:
In the Arduino simulator, upload the code to the virtual Arduino board
and start the simulation. Then, run your Python script. The Python script will
establish a serial connection with the simulated Arduino and send/receive data
accordingly.
Remember to modify the serial port
('COM3' in the example) in both the Arduino simulator code and the Python
script to match the virtual serial port provided by the simulator.
By following these steps, you
should be able to establish serial communication between a simulated Arduino
and Python using the PySerial library. This allows you to send and receive data
between the virtual Arduino and Python, simulating the behavior of a physical
Arduino board.
Section 6: Advanced Python-Arduino Integration
Take your Python-Arduino projects to the next level by
utilizing libraries like PyFirmata for more advanced functionalities and
processing sensor data in Python.
1. First, you'll need to install the `pyfirmata` library on
your computer. You can do this by running the command `pip install pyfirmata`
in your terminal or command prompt.
2. Next, connect your Arduino board to your computer via USB
cable and upload the StandardFirmata sketch onto it. You can find this sketch
in the Arduino IDE under `File > Examples > Firmata >
StandardFirmata`.
3. Now, you can use Python to control the Arduino board.
Here's an example code that will make an LED connected to pin 13 on the Arduino
board blink:
```python
from pyfirmata import Arduino, util
import time
board = Arduino('/dev/ttyACM0') # change this to the port
your Arduino is connected to
/* You can find out which port your Arduino is connected to by checking
the Arduino IDE.
Here's how:
1. Open the Arduino IDE and go to `Tools > Port`.
2. You should see a list of available ports. The port that your Arduino
is connected to should be labeled with the name of the board (e.g.,
"Arduino Uno" or "Arduino Nano").
* yours should have ports if your arduino is connected.
On Windows, the port will usually be labeled as `COM` followed by a
number (e.g., `COM3`). On macOS and Linux, it will usually be labeled as
`/dev/tty.usbmodem` followed by a number or `/dev/ttyACM0`.
Once you've identified the port, you can use it in your Python code to
connect to the Arduino board. For example, if your Arduino is connected to
`COM3`, you would use `board = Arduino('COM3')` in your code. If it's connected
to `/dev/ttyACM0`, you would use `board = Arduino('/dev/ttyACM0')`. */
led_pin = 13
while True:
board.digital[led_pin].write(1) # turn LED on
time.sleep(1)
board.digital[led_pin].write(0) # turn LED off
time.sleep(1)
```
Conclusion
By leveraging the power of Python and Arduino, you can
create exciting projects that blend software and hardware seamlessly. Whether
you are a beginner or an experienced developer, this comprehensive guide has
provided you with the necessary knowledge and steps to integrate Python and
Arduino effectively. Harness the potential of these two technologies, and
embark on a journey of innovation and automation. With endless possibilities at
your fingertips, you are only limited by your imagination. So, grab your
Arduino board, fire up Python, and start building incredible projects today!


No comments: